Sunday, September 18, 2011

Penny's Addiction

Hello Friends:
Have you ever heard of lip balm addiction? Well, Penny began to wonder about her own penchant for lip balm so it was time for some research. I don't mean research for the newest and most effective lip balm on the market by advertising standards. I mean research on whether or not there is something called 'lip balm addiction.'  According to my findings lip balm addiction is a myth.  Yes, I now know there are groups out there dedicated to 'support' lip balm abusers (who knew?) but there is no scientific or medical proof that constant use of lip balm is actually an addiction. There is nothing in lip balms that is habit forming or that compells us to be psychologically dependent on them, so continous use is not considered an addiction. So why does Penny have a tube of lip balm within arms reach at all times...home, purse, car, office, etc? Inquiring minds wanna know. LOL!

Lips normally have a very thin oily film on their surface that provides natural protection against moisture loss. As someone with generally dry skin and eczema, I didn't think it unusal that I had dry lips (not usually chapped, but dry). I also have to consider my frequent beauty product trials as some may have adverse effects on me. For example, there is something in MAC lipsticks that cause my lips to dry out severely and crack at the corners. After several trials I found that I could use their lip glosses but not their lipsticks, and I can't use anything constantly for a long period of time. I don't wear lipstick or lip gloss every day, but I do apply lip balm multiple times a day. Lately I feel like the more lip balm I apply, the more I need to apply it. So it got me to thinking....why do my lips feel dry all the time? Is there something in the lip balm that's causing the dryness? That is one theory. Because I don't lick my lips often (a common cause of dryness), I had to consider the ingredients in my lip balms. I've used many brands over the years such as Chap Stick, Blistex, Burt's Bee's, Aquaphor, Palmer's Medicated Lip Balm, and Sephora's Super Nourishing Lip Balm. I noticed that I often used "medicated" lip balms to soothe my feeling of dry lips and I enjoyed the tingling sensation caused by most. However, many of these balms, even the 'natural' ones, contain menthol, camphor, or peppermint oil which have been said to be a 'cause' of lip irritation and dryness. Some also contain fragrance and citric acid both of which I have a sensitivity too. So what is a gal to do to get a more perfect pout? (read full story...)

Saturday, September 17, 2011

Blank Face

Hola!
Question for all your make-up mavens out there....what do you use to REMOVE your make-up at night? I hope that no one is going to bed with make-up on. Humph! If you are, just don't let Penny know...she gets all worked up over things like that. LOL!

Penny has tried a number of make-up removers over the years and some may get foundation off but not mascara; others may get mascara off  but not foundation; so the search for one good product went on. Some of you are wondering...what's wrong with good old soap and water? LOL! Nothing at all...if you want to spend some time 'beating down the mug' (as one of Penny's friends would say). LOL! I always seem to have residue if I don't use something to break down the waterproof gel eyeliner, lipstick, and the various formulas of mascara I like to wear. Eyeshadow and foundation come off pretty easily with soap and water, but some products need an oil-based solvent to dissolve them.

Penny's favorite make-up remover/cleanser is Bobbi Brown's Cleansing Oil ($39, Bloomingdales). I love the feel and smell of Bobbi Brown's product but most importantly I love that it removes ALL my make-up at once. I put the oil cleanser on a dry face and gently rub it over my lids and lashes, and even my lips. This gentle oil dissolves everything and doesn't burn my eyes or leave my skin dry. The only drawback is the price. It is too expensive to purchase on a regular basis but is good for someone who doesn't use make-up often therefore allowing it to last longer. I love that this is a one-step process for cleaning my face and removing my make-up. BB Cleansing Oil is very similar to the more expensive Shu Uemura Cleansing Oils. Shu Uemura was said to be the pioneer of cleansing oils that remove make-up while maintaining the skin's balance.

Before I discovered BB Cleansing Oil, I used Clinique's Take the Day Off ($18, Sephora) for many years. This product is advertised as a make-up remover for "lids, lashes and lips" and it works well on all three. Just shake well before using (you will see the liquid separates in the bottle); saturate a cotton ball, and gently hold over your lid allowing the product to penetrate the eyeshadow and mascara for a few seconds, then wipe away the make-up. You may have to do this a few times. The only thing I didn't care for is the slightly oily residue this product left on my lids. But you have to wash your face afterwards anyway. What I did like was that it did not irritate my eyelids like other removers I tried in the past. My skin is super sensitive and my lids are easily irritated due to allergies. But this product worked fine. (read full story...)

Sunday, September 11, 2011

Foundation Fix

Hi there!
Penny misses you all. It's been a hectic month and a half, and I wasn't able to get here, but here I am. Before I get into my love for the change of seasons and all the fun fall trends that I've been reading about these past few weeks, I want to talk about my latest make-up foundation. Cover FX Total Coverage Cream Foundation SPF 30 (Sephora, $42).

With my melasma becoming more of an issue this summer (due to my own neglect and being out in the sun), I needed a full coverage foundation.  The Bobbi Brown Skin Foundation, and the L'Oreal True Match that I started the summer with wasn't enough to cover all my dark spots without a lot of concealer. The Cover FX was a referral by one of my favorite beauty bloggers (MusingsofaCityGirl-Cindy Diaz). I asked her for some suggestions and decided to try Cover FX. It is a foundation and concealer in one, which I so desparately needed. I was trying different concealers at the time because I noticed that in flash photos my MAC Studio Sculpt concealer was showing lighter under my eyes (reverse raccoon). I'm still not sure if it was a concealer problem, powder problem or foundation problem. But with the Cover FX this issue was greatly minimized.

Cover FX comes in over 30 shades but I highly recommend getting a professional to assist you in choosing the right shade for you. I was originally going to make my first purchase online, but eventually called around to three different Sephora locations before I found the product. When I went into the store I had a post-it note with the shade "I thought" was the right one for me, based on what I researched online. But when the sales rep offered to help me and swatched it on my jawline, I was completely off. The shade was too light. Turned out I was in a whole different category and after about three swatches we found that I was a B15. Since I get very pale in the colder months, I'm sure to purchase a different shade then by going back to Sephora and getting swatched again.

Thursday, July 28, 2011

Hair Affair

Hello there!

Are you looking for a new blow dryer, flat iron or curling iron? Are you a D-I-Y kinda gal that will give yourself a blow out, instead of going to the salon? Well Penny has a tip or two for you!

For the past few months I have been using a great blow dryer, flat iron and sometimes curling iron regimen. One of the things I like most about these hot tools is that they are 'wallet-friendly' but high quality. Both the blow dryer and flat iron I'm about to describe were recommended by a friend who has natural hair, but wears her hair in straight styles. I got a chance to see how they worked on her hair and I liked it. The curling iron I've had for a while and probably found after doing research on ceramic irons.
Natural Hair
(Damp; after wash & condition)

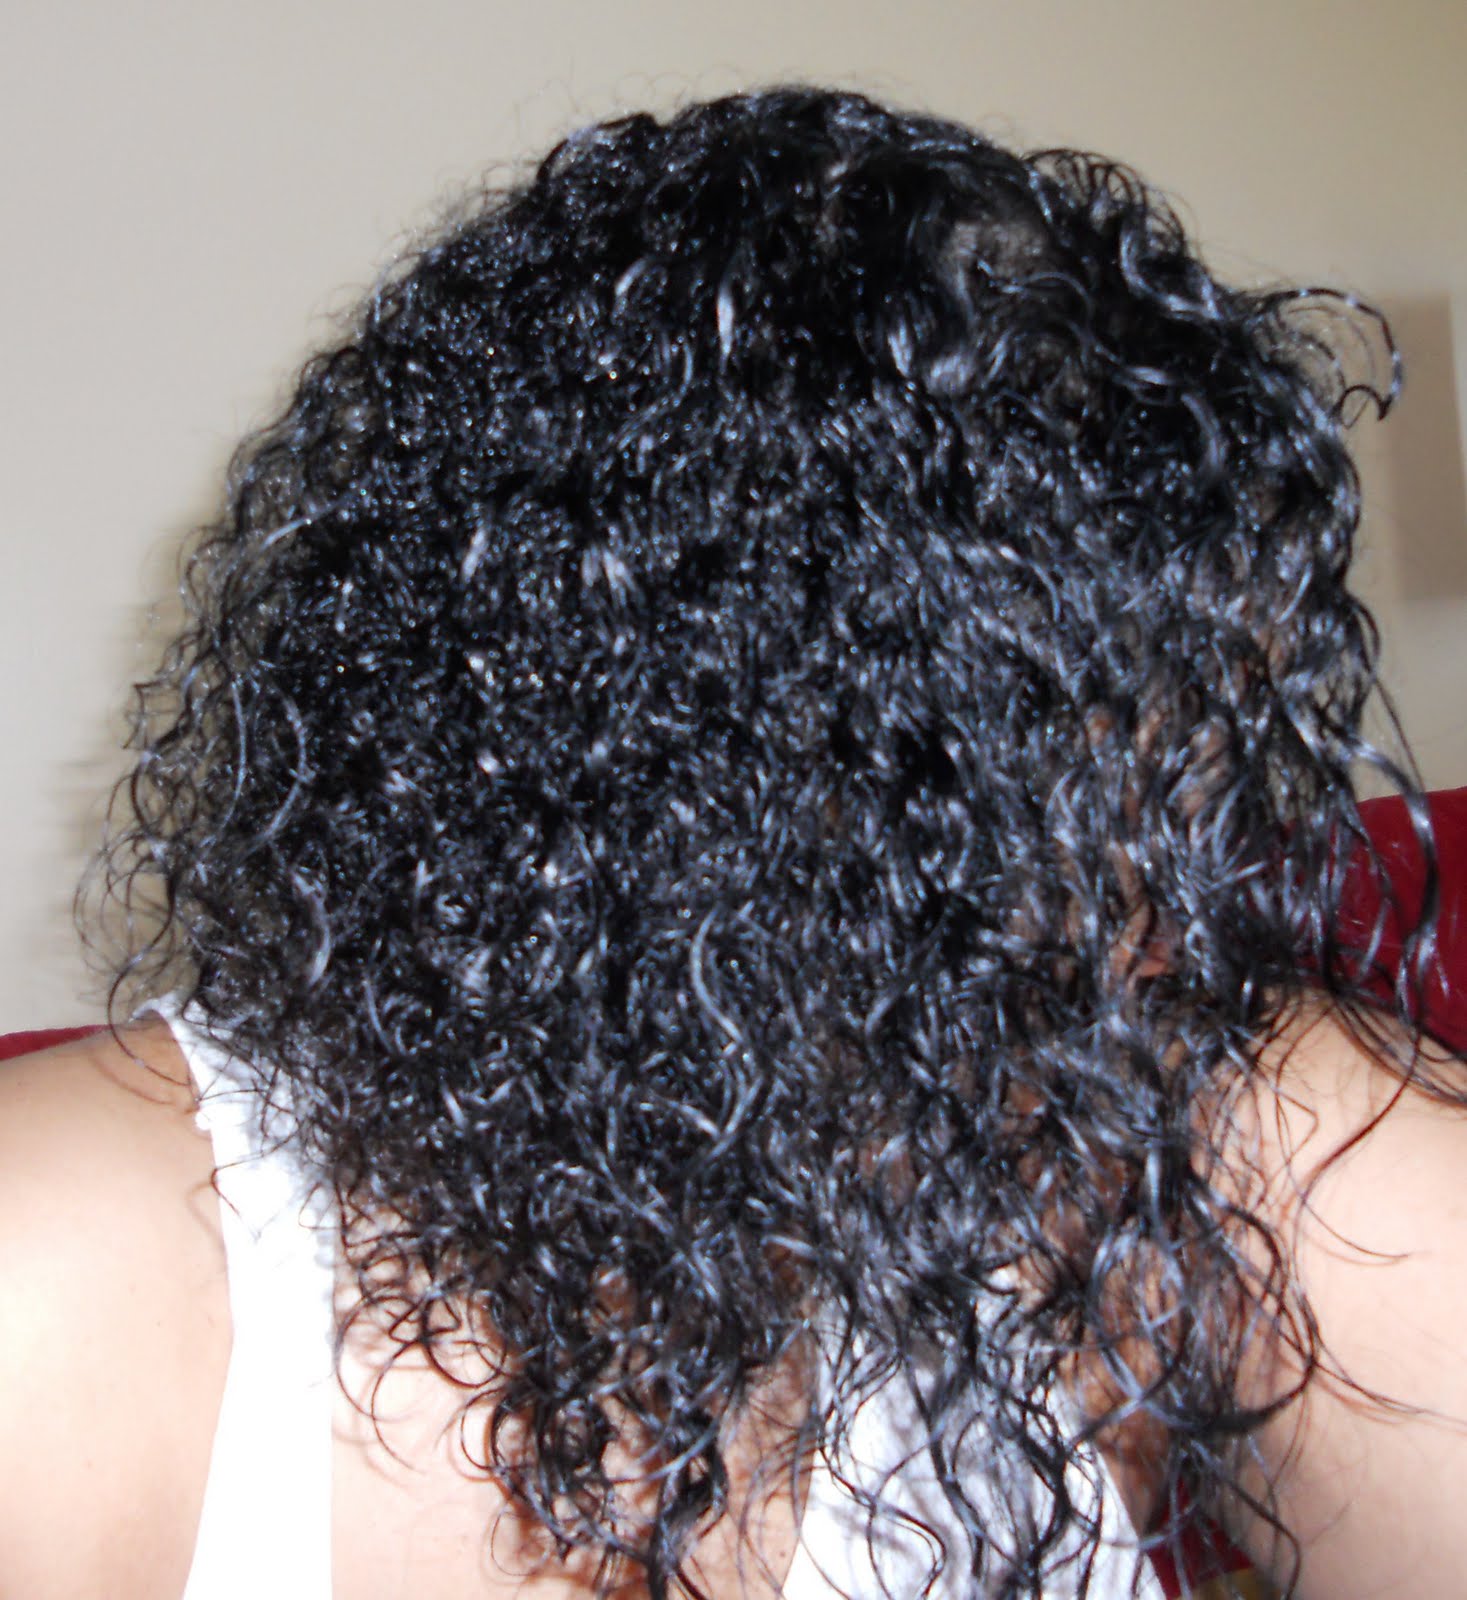
Conair Pro Silverbird 2000 Watts (Sally's, Amazon.com; $35-$39.99) - This dryer was so much lighter than my previous one, which was the first reason I was sold on it. My hair is curly, med/long in length and can be challenging to blow out straight.  I also like the comb/pik attachment because I can't blow out my own hair with a round brush like some folks. With the high heat settings I am able to get my hair very straight and it doesn't take much time (see pics). After I washed and conditioned my hair, I applied a little leave-in conditioner; and squeezed out the excess water with a towel. Then I worked some Sabino Lok and Blok serum (Amazon.com, $22) throughout, as I detangled my hair with a wide-toothed comb. After letting my hair air dry half way, I blow dry it completely. (see pic)
After blow dry w/ comb
 attachment

Penny isn't Penny without products. LOL! In addition to the moisture lock (Lok & Block) which I believe is essential to my smooth blow out, I use the following products when styling my hair (not always at the same time):
  • CHI Iron Guard 44 - thermal protection spray
  • PhytoSpecific Moisturizing Styling Balm w/ Qunioa Oil
  • Elasta QP Curl Wax w/ Aloe and Lanolin
TIPS:
- Always use a thermal protection product to protect your hair when using hot tools.
- Learn the proper heat settings for your hair type; every tool should have a guide. The last thing you want to do is burn your hair. Luckily with the new ceramic and tourmaline technology this is harder to do than it used to be.
- Use a damp washcloth to wipe clean your hot tool as you use it. While using the flat iron and/or curling iron I find it helpful to carefully wipe them clean as I finish a 1/4 section of my hair (I section it off in 4-5 areas usually). By cleaning each tool it helps to eliminate any product residue that could burn on the plate or barrel. No one likes to walk around smelling like an electrical fire. LOL!
- Look for hair tools with Ceramic, Tourmaline, and/or Ionic technology. Ceramic plates distribute an even heat preventing hot spots on the iron which can burn hair. It's better if the tool is not painted with a ceramic coating as over time that coating could start to peel or chip, leaving behind a burn smell and snagging the hair. A tool with ceramic and tourmaline means that it probably uses Far Infared heat. This type of heating heats the hair from the inside out, causing less surface damage. It is also said that tourmaline helps the hair to be smoother, more shiny, and frizz-free. When you see the word ionic on a product this means that the iron produces negative ions. Negative Ions work to eliminate frizz and static by smoothing and closing the cuticle layer.  (read full story....)

Monday, July 25, 2011

Nail Polish in the News?

Hi All!

Many of you know Penny is fast becoming a nail polish nerd. LOL!  I am proud to say that I've managed to keep my collection to 50 or less...so far. What can I say...I just like what I like. Part of the reason for my obsession with nail polish is this great nail blog I subscribe to called All Lacquered Up. http://www.alllacqueredup.com/  I find lots of great new polishes and colors through this blog (check out her gallery). So I found it interesting that this blogger was chosen to debate "nail polish" of all things in The Opinion Pages of  The New York Times. (See link)

Why Did Wild Nail Polish Go Mainstream?
http://www.nytimes.com/roomfordebate/2011/06/30/why-did-wild-nail-polish-go-mainstream-10

The 'comments' are just as interesting (if not more so) as the topics being discussed by the seven debaters. If you get a chance I suggest reading some of the other articles by those in this debate. No matter how you feel about nail polish COLORS these days, there is no denying that it's the newest IT accessory.  Not only have colors changed over the years, but nail art, textures and techniques are now all the rage. While Penny is still somewhat conservative after all these years (no crackle, no gems, no designs, etc)...I began to go out on a limb about a year ago with some of the trendy colors in varying shades of grays, blues, purples and greens.

My brand du jour is Zoya! http://www.zoya.com/   It's a great long wear, polish with over 300 colors to choose from. It is also a 4-Free polish (free of toluene, formaldehyde, DBP (phthalates) and camphor). The only down side is that these polishes are not widely available. They are only sold at spas and salons. You can plug in your zip code on their website to see where the polishes are sold near you, or call: (800) 659-6909, Customer Service. Yes...Penny called. LOL! I am fortunate enough to be able to purchase my polishes at Hair Cosmopolitan (& Salon) in White Flint Mall, Rockville, MD, not far from my job. I also order online. Right now Penny is trying to refrain from pre-ordering several of the new fall colors. LOL!

I still use OPI and Essie polishes as well. They have great collections and are also long wearing. OPI  and Essie offer 3-free polishes too. The other polishes I want to try in the future are Butter London, SpaRitual and NARS. I like Chanel's colors but choose not to pay $23 for a bottle of polish when there are so many budget-friendly brands to choose from. My only splurge has been a couple of Rescue Beauty Lounge (RBL) polishes ($18 ea) when there was a discount promo. ;-)
My favorite top coat is Seche Vite Quick Dry Top Coat (CVS, ULTA; $9.95)...great shine and durability. My polish looks 10x better, and lasts longer. I found that the nail salons don't always use a quality top coat, which defeats the purpose of a good manicure if you ask me. (Don't be fooled by what the bottle says). I take my polish and top coat with me to just about every salon visit. If I had natural nails (I wear acrylics or silk wraps) I would probably try Seche Vite's nail strengthener as well.

NOTE: Free polishes are polishes developed without key toxic chemicals that we should be aware of in our polishes. See this link for a more detailed explanation:
http://www.alllacqueredup.com/2007/05/big-3-chemicals-that-is.html

Check out this link for an extensive list of 3-free and 4-free polishes: http://www.alllacqueredup.com/2009/04/celebrate-earth-day-check-your.html

Be blessed. Be beautiful.
Penny

Wednesday, June 22, 2011

Penny's UPDATE - More Sunscreen

Hola!

This is just a brief follow-up to the posts I did previously (May 25th & 27th) on the importance of SUNSCREENS.  The Food and Drug Administration (FDA) recently cracked down on sunscreen manufacturers and what they can claim on their labels. Key things to note:
  • Manufacturers now have to 'prove' that their products protect against UVA and UVB rays if claiming that they reduce the risk of skin cancer, wrinkles, and sunburn
  • Sunscreens also have to have an SPF of at least 15 to make that same claim [NOTE: Most dermatologists recommend no less the SPF 30].
  • FDA is barring the use of the terms: sunblock, waterproof, and sweatproof
  • Labels must be changed to reflect the new requirements
  • FDA also plans to ban the use of any SPF rating above 50, since there is no evidence to prove that those products provide adequate protection.
Here is a link to the Washington Post article from June 14, 2011 regarding the FDA's requirements...check it out!

http://www.washingtonpost.com/national/fda-cracks-down-on-sunscreens/2011/06/14/AGaz3fUH_story.html

Be blessed. Be beautiful. Be smart. Be safe.
Penny

Saturday, June 18, 2011

Lip Locked (Part Deux)

Penny here!
For some reason after I post something I remember six other things I should have included in my write up. smh. LOL!

So in my last post Penny encouraged folks to 'update' their lip look and be sure that they were choosing the right liner, and blending their lip liner correctly.  Most everyone has natrual color to their lips; look closely at yours when shopping for a brown or nude lip liner. Here are the important things to remember:
  1. Blend your lip liner by pressing your lips together and moving them back and forth, or use your finger to lightly smudge the line inward. 
  2. Do not overline your lips. Search Google and Youtube for techniques on how to line your lips (especially if you want them to appear fuller).
  3. Find a lip liner color that matches your natural lip color or your lipstick  
  4. Find a color liner that compliments your lipstick or gloss (not one that directly contrasts it)
  5. To get the most out of your lip color one trick the pros use is to dab a little foundation or concealer on your lips to diffuse your natural lip color and let the true color of your liner and lipstick show through. This is especially good for the "nude lips" look. NOTE: Try not to do this every day as it could dry out your lips. M.A.C. used to have a product called Lip Erase, not sure if its still available.
Just to be clear, Penny's not saying that you can't wear dark brown lip liner with something other than brown lipstick or gloss. I'm saying if you do...if there is a look you're going for...if your natural lip color is close to dark brown...then please, please, please blend the heck out of  your lip liner so that the lines are diffused and your lips don't enter the room before you do! LOL! This also applies to purple liner with pink lipstick, etc. Lip liner should be blended into the lipstick. Lip liner can also help your lipstick color to last longer if you fill in your lips entirely with a matching color lip liner. If your comfort zone only allows you to use dark liner, then try a lipstick or lipgloss shade that compliments the darker liner instead of one that is in direct contrast with it. 

Back in the day the look was M.A.C's Chestnut liner with popular shades like  Oh Baby, Chai, or Explicit.  Rupaul rocked the look as late as 2008...but he/she is Rupaul after all! LOL! To update the look, try M.A.C liner in Cork or Oak, and Tinted Lipglass in C-Thru, Spite, or Revealing. Cork also looks great with Hug Me and Honeylove lipsticks. Penny also noticed that the more modern take on this duo usually includes a creamy, or lustre formula lip color or high gloss...instead of a 'frost' formula. (read full story...)

Monday, June 13, 2011

Lip Locked (Revised)

NOTE: Penny wrote this piece a couple years ago (pre-blog) but decided to revise and re-release it...so here goes. Penny knows she's going to get a lot of flack for this one...but oh well. LOL!.

"Back away from the dark lip liner/light lipstick combination!"
We all know the look...we see it all the time. [Think Pamela Anderson, Kim Mathers, and Sara Palin...yikes!].  Yes, this is an outdated look ladies. Don't shoot the messenger; I'm not setting fashion trends or making up beauty rules. LOL! Speaking of rules...there are always exceptions....let's talk about your options. 
"To line, or not to line?...that is the question."
The purpose of lip liner is to keep your lipstick from ‘bleeding’ onto your skin. Some use it to even out lip shape or to try to make your lips appear a little fuller. Lip liner is also supposed to look ‘natural’ according to the pros. When applying your lip liner, remember that it should to be the same color as your natural lip color, no more than one shade darker, or the same color as the lipstick/lipgloss. Never use black anything to line your lips unless your creating a vampire look. LOL! Always blend your lip liner well by smudging it from the outer edges of the lip inward toward the center; its easist to use your finger. Do not leave a hard line around your lips; this is called overlining. If you think blending the liner will change your lipstick or lipgloss color, then pick a shade close to the lipstick/gloss color. It's the APPLICATION as well as the COLOR combination that makes lips hot!

Penny loved her M.A.C. Chestnut liner too back in the day...but now it only goes with dark lipstick shades and is blended well. There are other shades of medium brown liner (i.e., Cork, Stripdown, Spice, Hover by M.A.C.) that will give you a more updated look if blended well with your lipstick or gloss...look for medium browns or pinkish-browns that can be worn with a variety of colors. This is especially for you ladies who have a hard time letting go...just go a little lighter and blend well. (read full story...)