Sunday, April 29, 2012

Talking Techniques - Part 3b

Hello all.
So let's continue our discussion about eye make-up techniques. Ok...so once again its almost a month since my last post (3/25) and since I began this piece. So sorry for the delay. My last post covered eye shadow to the 10th power. LOL! So let's complete the eye by talking eyeliner, mascara and maybe a little about faux lashes. We might throw in some brow talk too. Let's get started...
Eyeliner is hot these days! The trend is to use bright colors and/or create a winged shape or cat eye. Of course trends aren't for everyone so let's start with the basics of eyeliner application. As a general rule, the thickness and intensity of the eyeliner should correlate with the size of your eyelid—the larger the eyelid area, the thicker yet softer the eyeliner should be. The smaller the eyelid area, the thinner and more intense the liner should be.  If your lid doesn't show much, you might want to skip the eyeliner, use lots of mascara and use a deep shadow to enhance the shape of the eye. Understanding the shape of your eye, as mentioned in the last blog post, not only helps with eye shadow application, but with liner application as well. Eyeliner can help to give the illusion of wider eyes or make eyes look smaller. It can be dramatic or simply enhance the eyes and eye color.
Eyeliner Styles
Penny has smallish eyes with hooded lids, and I still wear eyeliner with every look. I don't have lush or long lashes so the liner gives me the perfect amount of intensity & brings out my eye color. I love a smokey eye look but realized that it makes my eyes even smaller. So I learned different techniques that allow me to use liner to darken my lash line without concealing my already small lid. Although I think the winged liner look is hot, I don't have the right shape eyes to pull it off.  So on most days I use the technique from the first look (top left) in the diagram; or the more natural look on the top right. I rim my entire eye if I'm doing a smokey eye or just want my eye color to pop.
(read full story....)

Sunday, March 25, 2012

Talking Techniques - Part 3a

Hi all:
Once again its been too long since I've said HI! Sorry but 'life' keeps interrupting our party. What's a girl to do? Believe it or not, I started this post over a month ago (sigh).

Well today I'm going to continue with my "Talking Techniques" series and talk about the eyes and eye shadow. There is so much on the topic I'm going to have to do a sequel on eyeliner and mascara application. All from Penny's experience of course. Hope it helpful.

Eye Shapes/Looks
Before applying eye shadow you should determine what shape of your eyes. I know it sounds like a bit much but it makes sense when you think about it. Different eye shapes require different techniques. In my research for this post I came across this diagram which I thought was pretty helpful. Below are the various techniques described (which I also hi-jacked off the Net. LOL)

Average: Apply contour (darker color) along lash line, then along crease for a V-shape. Blend the application. Create a wedge at the outer corner using an accent color. Line upper and lower lashes.

Wide Set: The emphasis is on the inside half of the eye above the crease. Apply contour shade along lash line from inside corner out, then back along crease to inner corner. Add an accent color in a small wedge at outer corner, being careful not to extend beyond the edge. Line upper lashes from corner to corner, adding a little lift at the outside. Line lower lashes and gently smudge.

Close Set: The emphasis is on the outer half of the eye. Apply contour shade along lash line and in the crease, starting above outer edge of iris, extending beyond outside corner and up. Blend the application. Make a large wedge at outer corner with the accent color. Line upper lashes from inside edge or iris past outside corner of eye. Emphasize mascara application on outer lashes.

Deep Set: The key is to lessen the shadows on the inside corner and make the brow bone area look less recessed. Apply more base color at the inside corner of the lid. Apply contour shade out along lash line and in along crease, stopping just above the inner edge of the iris. Add a little more color under lower lashes from inside edge of iris to outer corner. Add accent color lightly along crease, blending well. Line upper lashes from inside corner to just past outside corner, lower lashes from outside corner in to just below the pupil, gently smudging.

Prominent Lids: The key is to contour below the crease to draw attention away from how much lid is exposed and to emphasize the upper lash line. Add contour shade over entire eye socket, blending carefully. Apply accent color along lash line from inside corner to slightly past outside corner, then in below crease instead of along it. Line upper lashes from inside corner out, with the line getting thicker at the outside corner. Line lower lashes, then gently smudge upper and lower line application.

Hooded Lids: The key is to use color to make it seem as though more of the lid is showing. Apply contour shade on lid from corner to corner, extending slightly above crease, and under lower lashes, working from outside corner to inside edge of iris. Apply accent color close to lash line above center of pupil and blend outward. Line upper lashes corner to corner, lower lashes from outside corner to inside of iris. NOTE: Keep in mind that the wider the liner above the lashes, the less lid you will see. Penny has hooded eyes so to open up my eyes I started lining my upper water line (where the lashes come out of your lid) instead of above my lashes.
(read full story....)

Monday, January 30, 2012

Talking Techniques - Part 2

Hi all:
I apologize for the delay in bringing you Part 2 of Talking Techniques. My paying job had the nerve to actually get in the way of my blogging. LOL! This is a continuation of my previous post about make-up application and techniques. Hope it's helpful.

L'Oreal True Match SPF 17 ($10.99)
Foundation:
There are many foundation formulas and many ways to apply them.  I recommend asking a make-up professional for the best formula to suit your skin type and needs. Since Penny has dry/combination/maturing skin I often use cream foundation in the winter months and liquid in the summer months for lighter coverage. Right now I'm using Cover FX Cream Foundation. I use cream because it provides the best coverage for my melasma (dark patches); has great staying power, and doesn't feel heavy. In the warmer months I might use Bobbi Brown Skin Foundation SPF 15 or L'Oreal True Match liquid foundations. TIP: Always blend foundation from the center of the face outward. Be sure to blend well around the hairline. If you get any in your hair simply wipe away from the face with a towel.

I always set my foundation with powder. That keeps my foundation in place all day and gives me the matte finish I want. Right now I'm using MAC's Mineralize Skinfinish Natural because of its light texture and even wash of sheer color. Translucent powder or white powders tend to make me look ashen (especially in flash photography). I used to use a big powder brush to apply my finishing powder but recently picked up a tip online for applying it with a powder puff. The reason for this is because brushes can sometimes disturb the make-up underneath with the dragging motion used to apply the powder. While using a powder puff allows you to press the powder into the skin, keeping your foundation in tack. I simply tap the puff on the back of my hand to shake off any excess before lightly pressing it onto my skin all over. Be sure to check for even application.


Mineral (Powder) Foundation
Powder - Powder foundations are applied with a cosmetic puff, sponge or brush. Many come with their recommended applicator. Powder foundation can be layered to achieve the coverage you seek. Keep in mind that if you use a sponge applicator you should wash it often.  Mineral powder foundations have become very popular and often require that you use a brush to apply (buff) them into the skin. Mineral foundations are said to be best for people with easily irritated  skin. "What makes mineral makeup different from traditional makeup isn’t the ingredients it contains, but what’s left out. That list, for many leading brands, includes preservatives, parabens, mineral oil, chemical dyes, and fragrance. These are all possible causes of irritation, one reason many dermatologists recommend mineral makeup."...Webmd.com  (see complete article at: http://www.webmd.com/healthy-beauty/features/the-lowdown-on-mineral-makeup) Penny has not used a powder foundation in a while but thinks it works well for younger women, and/or  those with oily skin types. There is no need to "set" this foundation since it is already a powder and could look cakey if too much is applied.
Cream - Cream foundations are applied with a sponge or foundation brush. I use a Beauty Blender ($19, Sephora) to apply my cream foundation because I like the even finish. For those of you not familiar, a Beauty Blender is simply a pink egg-shaped sponge that shrinks when dry and becomes larger when dampened. Wet the sponge with water and squeeze out the excess. The sponge applies cream smoothly and evenly with a dabbing motion. Foundation brushes can sometimes leave streaks where a sponge gives more of an airbrush finish. There are other blending sponges available that
Blender Sponges
cost less and are said to have the same effect. I have not tried any other brand.

Liquid - Liquid foundations are applied with a sponge or foundation brush. But I actually like to apply mine with my finger tips. LOL! Simply dot your face with the product and then blend it all in with your finger tips. Again, remember to blend outward and blend well around the hair line. A sponge is good if you want light coverage as some of the product will soak into the sponge. I also use a foundation brush with my liquid foundation since it is a lighter consistency and doesn't tend to get streaky. Some like a 'dewy' finish to their make-up where liquid foundation is often used as a base because of its lightweight texture. Then mattes and highlighters are used to achieve a dewy, natural finish.

(read full story...)

Monday, January 16, 2012

Talking Techniques - Part 1

Hola!
Often times I get questions about "how" to apply make-up. Or someone will say, " I don't wear eyeshadow because I don't know how to put it on." So Penny thought it was time to do a more detailed post about application and techniques. But first let me share my disclaimer: "Penny is not a professional make-up artist nor do I play one on TV." LOL! Please get a consultation from a pro as I've found there are often 'many' right ways to make-up application. Most importantly...HAVE FUN with it! Don't stress over your make-up. Take your time and PRACTICE!

I feel like every time I wear make-up it's an experiment of some sort, even though I have been playing with products for years. LOL! I have had many free make-overs and consultations with professionals. And I spend lots of time online watching YouTube tutorials. I also pay attention to my own facial features and search online for tutorials that address my personal challenges (i.e. small eyes, hooded eye lids, maturing skin, dark circles, eye liner run, etc).

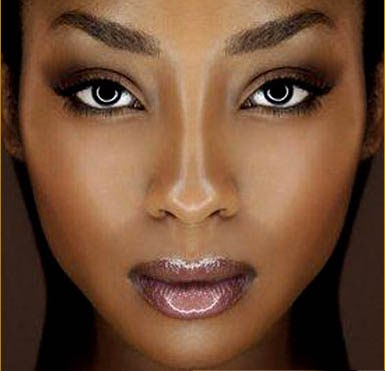
One way to apply foundation.
What I wanted to share here are not only techniques that have worked for me, but also advice I've come across from my numerous hours of research. Remember, this is not about choosing the right foundation for your skin tone, or the right color eye shadow to compliment your eyes. This is about application and some of the things we may not have thought to try.  I like to say "I'm putting on my face" when I'm applying make-up. Not because I'm trying to disguise myself in any way. But because I like the transformation I see when I use my make-up to enhance my natural beauty. Make-up is another accessory for Penny...it is not mandatory...it is just what I like. Although I honestly feel more inclined to 'put on a face' the older I get since my skin has changed over time. For me it's still a fun adventure though. I hope it can be for you too.

Tools:
MAC Face Brushes

First you have to make sure you have the right "tools for the job." Finger tips are some of Penny's best friends, but I also have quite a few make-up brushes and other applicators I use regularly. I have found that with the right tools it doesn't matter if you're using expensive or inexpensive cosmetics; you will get a nice look. Most of you won't like to hear this but it can be a costly adventure if you don't build your make-up brush collection slowly. Good make-up brushes can be expensive. There are duplicates out there that get the job done at a much more reasonable price, but it is all trial an error. So sometimes I try to decide it its worth me buying a $30 brush that will last me half a lifetime with proper care...or a $10 brush that I would have to replace 3 times in half a lifetime. Up to you. LOL! Also keep in mind that brushes have multiple uses, and that the best collection consists of natural hair brushes, as well as, synthetic brushes. Natural hair brushes are said to be best for powder products. Synthetic brushes are a bit more multi-functional because they can be used with both powder and cream or liquid cosmetics. Keep in mind that they are definitely not all created equal, so you might have to shop around. If you have any brush and the bristles are falling out a lot, then its probably not well made and/or hasn't been cleaned in a long time. Your brushes also should not feel scractchy or rough on the skin.


Cozzette Starter Brush Set ($161)
Learn what the brush is used for before you buy it. Ask the make-up rep or go on YouTube...someone there will tell you. LOL! Penny's personal favs are by Bobbi Brown, MAC, Sephora, Laura Mercier, and, Bdellium Tools (although I'm still building my collection). Other lines I plan to try soon are Cozzette, and Obsessive Compulsive Cosmetics (OCC). Check previous posts for some cheaper brands like Bdellium Tools, Sigma, and Sedona Lace. If you're looking for an inexpensive starter kit, try EcoTools found in your local drugstore and at ULTA. 

Basic tools of the trade: Cosmetic sponges (various sizes), powder puffs, all-over powder brush, blush brush, eye shadow blending brush, eyeliner brush, angled eyebrow brush, and clean hands. :-)

  • Tip #1: To improve the life of your make-up brushes you must keep them clean, and be gentle with them. Your brushes should not appear as if they were in a fight with your face. LOL! Depending on how often you use your brushes, once a week or once every 2 weeks would be good for cleaning. Use a make-up brush cleanser (Sephora Brush Shampoo, $6-$14) or regular baby shampoo.
  • Tip #2: Take baby steps. If you don't plan on spending some quality time in the mirror with your make-up, figure out what your 'go to' look is and focus on the tools you need for that look.
  • Tip #3: Also keep in mind that around the holidays you might be able to get multiple make-up brushes, often in travel sizes, at a better price than purchasing them individually. Keep in mind that some people say that the brushes in the gift sets aren't always of the same 'quality' as the regular brushes. It might be best to make the purchase in-store so you can compare for yourself. If you order online, check the return policy before you purchase.  MAC currently has a kit called the Make it Perfect Brush Kit Essentials for $49.50 which includes five (5) special edition travel size brushes; 3 for eyes and 2 for face. 

Prep & Prime:

Be sure you're starting with a clean, moisturized palette. (Leave a comment if you want to know what Penny uses to cleanse). Wash and pat dry your face. Add your moisturizer and/or sunscreen. Let that sit for one minute to make sure your skin care is absorbed before applying primer. Although make-up primer might be a new concept to some, I have found it to be a necessary part of the process. My make-up (especially eye make-up) stays on so much better when I use primer. There is usually no creasing or smudging of my make-up. I'm not one to re-apply my make-up several times a day, so staying power is important to me.

Penny's Primer Picks: For eyes - Too Faced Shadow Insurance, Urban Decay Primer Potion. For face - Smashbox Photofinish Primer, and Make Up For Ever (MUFE) HD Primer.

Since there is so much to share regarding make-up techniques and tools, I broke this post up into separate parts. More to come on applying foundation, eye shadow, etc. Keep reading...

** Please see the rest of this write up in my next post, Talking Techniques - Part 2.**

Be blessed. Be beautiful.
Penny

Friday, January 6, 2012

Exciting Nail News!

Hi All!
It's no secret that Penny has a penchant for nail polish. (More like an addiction but no intervention is needed as yet). LOL! Well, I had to share this latest news about a great deal from my favorite brand of 2011...Zoya. See my previous posts about why I love this brand.

Burke
For 2012 Zoya is offering everyone a chance to try TWO nail polishes of their choice, for just the cost of shipping and handling. They have over 300 colors to choose from; something for everyone. This offer excludes the two new 2012 Spring lines (True & Fleck) that are only available for pre-order. That means all you pay for 2 bottles is $6.95 for Standard shipping (5-9 days), or $8.95 for Expedited shipping (3-5 days). Either way its a steal of a deal with Zoya polishes being $8 a bottle. And if you're a bit of a polish fanatic like Penny, you can purchase an additional $25 or more and get FREE shipping.  Here is the message I got from Zoya today:

 
In 2012 we want everyone to try Zoya and add some new color to their world.

Dulcinea
So from now through 1/9/2012 11:59 PM ET we are going to let you try
any* 2 bottles of Zoya Nail Polish for FREE on ZOYA.COM.  

All you pay is the standard shipping charges.

As a bonus, you can purchase an additional $25 or more of Zoya or Qtica products and get FREE Shipping Too!..Bonus!

Use Code: ZOYA2012  

Please see the complete official instructions and terms & conditions on our blog:


*Promotion Excludes True & Fleck Effect Collection Colors

 
I'm all over this deal! Yes...of course Penny already ordered. LOL! What about you?

Danni
Be blessed. Be beautiful.
P


Sunday, January 1, 2012

Happy 2012!

Penny (and I) wish you all continued blessings in the coming year! Although life can be challenging at times, I always remember something my great grandma used to say..."every disappointment is a blessing in disguise." So even if you don't always feel blessed...know that you are...as you are loved and alive! I pray for a healthy year for us...a year that is more prosperous than the last...and one that gives us the peace of mind to start and end each day positively. True beauty comes from within.

Thank you for your support always! Penny will continue to do her part to share her musings from the beauty world. Please continue to read my blog, share it with friends and family; encourage them to subscribe, and leave lots of comments.

Be blessed. Be beautiful.
Be you!
Penny

Friday, December 30, 2011

Now What?

Hola! So in my last post ('Holiday Harriet') I shared some of the make-up I have been using this holiday season (and I even forgot a few things...smh). But now what? What to do with it all you ask? Well, here are some quick tips and tricks for creating your holiday looks!  We all know we have a few more nights to party and we want to bring in the new year on point (especially with that damn Facebook documenting it all in chronological order...sigh). So let's make sure we don't try a new make-up accessory and commit any fashion felonies folks. LOL!

Here are a couple of GENERAL things to remember:

  1. If you're going dancing or any place that might be hot, be sure to take oil blotting papers or your pressed powder to touch up your face throughout the night
    • Penny uses MAC's Oil Blot Powder or Boscia's Oil Blot Papers
  2. Wear waterproof mascara in your favorite brand; it won't smudge if you get all emotional at the top of the hour, or if you just tear up when you laugh like I do. LOL!  
  3. Wear lip liner and fill in your lips with lip pencil. This allows you to have color even if your lip gloss or lipstick wears off. If you're concerned about changing the color of the lipstick/gloss, use the same color lip pencil or one that is a shade lighter. Some of you don't want to fight your way to the ladies room, or remember to reapply your lip gloss or lipstick as the night goes on; so this is very helpful. 
    • If you're wearing red or dark colored lipstick this is a must!
  4. Think about what you want your focal point to be: Are you playing up your eyes? Your lips?  Your cheeks? Try not to go all out if you're a make-up novice.
    • Remember to always start with a light application of any product; it's much easier to go heavier/darker, than to fix a mistake because you put too much of something on.
  5. Don't touch your face with your bare hands too much. You want to keep your make-up on your face and avoid any possible transfer.
    • Be mindful of other people's clothing. Even with make up setting spray I think there is always a chance for some transfer.
  6. We may not all like to use hair spray, but you might want to consider a light, brushable one for the weekend's festivities
    • Penny recommends Sebastian's Zero Gravity Hair Spray ($9); Garnier Fructis Style Sleek and Shine Anti-Humidity Hair Spray ($4); L'Oreal Elnett Satin Hair Spray ($9-$15)
  7. Carry Wet One's (Citrus Scented) in your purse if you can for emergency clean up. These work wonders for getting drink and food spills, even make-up out of clothing.
  8. Always carry a compact mirror to check for eyeliner smudge or lipstick on the teeth (not a sexy look)
  9. Please be sure that you're wearing the right under garments and that everything fits properly (go try them all on now!) There is nothing worse than the look or feeling of ill-fitting attire. Check your bra straps. Just sayin...
  10. Pack your portable flats in your clutch or at least have them in the car. We all know that familiar burn in the balls of our feet that comes on half way through the night. Ummm hmmm. Walking out of a party barefoot is not a sexy look (unless your on the beach at a luau).
  11. Give yourself time. Unless you're already good at it, make-up application is not a quick process. There are several steps to take for a flawless face.
  12. Carry mints in your purse...nuff said. LOL!
(read full story...)

Wednesday, December 28, 2011

Holiday Harriet

Hi!
Happy Holidays! I know I've been missing in action and I apologize. Sometimes I have writer's block and I can't bring myself to write/focus. Other times I have too many things I want to talk about and don't know how to narrow it down. LOL! So feel free to let me know if there is something you want to know about.


The holidays are a fun time for Penny...so many new products...so many looks to try! LOL! With the many holiday festivities upon us...company parties, charitable functions, family gatherings, cocktail parties, concerts, New Year's Eve party, and more, what better time to amp up your look. Make-up is an accessory like any other. If you're going to buy a new dress, new shoes, a new clutch, and new accessories, why not add new lipstick or eye shadow to the list. A different make-up technique can change your appearance as much as any outfit can. Stay in your comfort zone or go all out...its up to you. But if you play it safe, be sure that the small change you makes a difference. For example, if you've never worn red lipstick, now is the time. Try a bright colored eye liner. If you're not used to sparkles, add a touch of glitter. Penny not only did the red lip this season, but I've even done a smoky eye and plum lip (instead of my usual nude lips) and I looked fab! (If I must say so myself). LOL!

(Courtesy of Black Opal)
For example, I tend to wear matte eyeshadows the most. I love the look, and they are more 'age appropriate' for me with my hooded eyes. LOL! But druing the holidays there is nothing wrong with a little shimmer or sparkle. So I take it to another level by playing with shimmery shades, brighter pigments, or deeper jewel tones. I also began wearing false lashes this season! Yeah...Penny's going there! (Nevermind I might look like the sister of a drag queen since I dont always get the strips on right. LOL! No offense to any queens or their siblings...one love!)

Anyhoo, since there are so many 'holiday looks' out there, Penny is just going to share some of the products she's been using this season:

I start with a cleansed and moisturized face:
  • CeraVe Hydrating Cleanser ($14) - used on skin without make-up
    • Boscia Makeup-Breakup Cool Cleansing Oil ($26) - used to remove my make-up after I've done my damage out and about. LOL
  • CeraVe Moist Facial Lotion P.M. ($10)
Then I prime my face:
  • Smashbox Photo Finish Primer ($17, travel size)
  • Make Up For Ever (MUFE) HD Microperfecting Primer - just trying a sample of this now; so far so good
  • Too Faced Shadow Insurance
  • Too Faced Shadow Insurance ($18) - just for eye lids

Then I work on my eyes. This is new for me to do this first. When doing a smokey eye especially, the pros recommend that you put your eye make-up on before the rest of your make-up so that you can clean off any fall out under your eye without disturbing any make-up on your face. It works!
  • MAC's Paint Pot (in Painterly) - used as my base to neutralize my lids and help eyeshadow colors to show true to color. My lids are dark naturally so I use this as a base to even out my skintone.
  • Eyeshadow colors depending on the look I'm going for. I use the following brands almost daily: Bobbi Brown, MAC, Coasta Scents palette, and Urban Decay
    • Colors that are standard for Penny: Urban Decay in Naked (matte) or Gunmetal (shimmer); Bobbi Brown in Cocoa (matte) ($20); MAC's shadows in Smut, Fig, Sketch, Rice Paper, Humid, and Outre, etc; Smashbox palette for hazel eyes ($42); NYX Eye Shadow Single in Black (matte) as a liner ($5).
    • Sometimes I use ULTA brand shadow in Gold Leaf ($7); or Sephora brand eye shadow in City Fog, a perfect matte gray ($12)
    • Sometimes I use Revlon  Eye Shadow Single in purple or navy (both matte)
    • Sometimes I use NYX Jumbo Pencil shadows as a base to create intense and vibrant color (Gold, Dark Brown, Purple, etc).
  • Eyeliner colors vary but I use the following often: Urban Decay 24/7 Glide-on Liner Pencil in Zero ($18); Bobbi Brown Gel Eyeliner in Granite, Graphite, or Saphire ($21); Buxom Lashliner in Leatherette ($16)
  • Mascara: Benefit's They're Real Mascara ($22);  Buxom Lash ($19); Buxom Amplified Lash ($22); or L'Oreal False Fiber Mascara ($8)
  • False Eyelash Strips: Ardell #53 ($4), Mod Lash #108 ($5), or Red Cherry,747S ($13 for 6pk).
After my eyes are done, I clean up any fall-out under the eyes with a damp wash cloth or make-up remover towelette. (read full story...)